Best Camera Settings for Music Videos
I ruined a full day of shooting once because I forgot to change my frame rate after testing slow-motion shots earlier that morning. Eight hours of performance footage at 120fps, all with that slightly unreal smooth-motion look that reads immediately as wrong for a narrative music video. The correction in post took longer than the shoot. That mistake — and the best camera settings for music videos that would have prevented it — is what this article is actually about.
Quick answer: 4K, 24fps, shutter speed 1/50, aperture f/1.8–f/2.8, base ISO, Log profile if your camera supports it, white balance locked manually. Shoot 60fps or 120fps only for footage you plan to slow down. The rest explains why each number matters and what to do when conditions force you to adjust.
Frame rate: 24fps for cinematic, 60fps for slow motion
Frame rate is the first decision because everything else — shutter speed especially — depends on it.
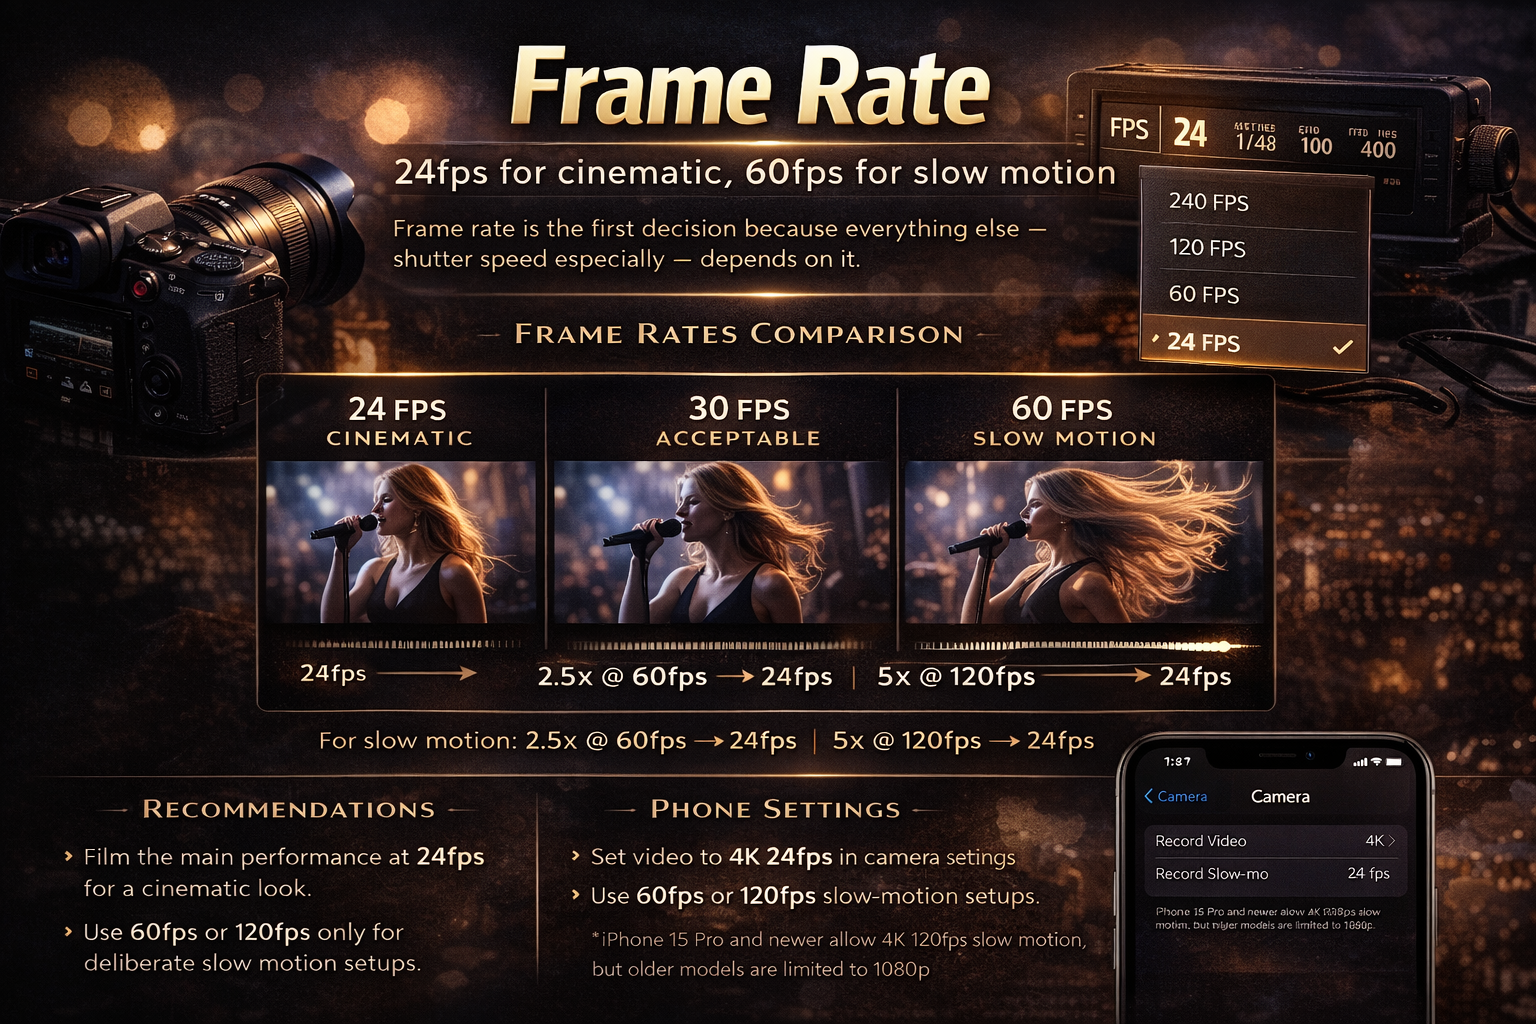
24fps is the cinematic standard. It produces the motion blur and visual cadence that audiences associate with film. Almost every music video you've watched and thought "that looks cinematic" was shot at 24fps. It's not about technical quality — 60fps captures more information — it's about what the brain has been trained to associate with intentional filmmaking versus amateur video.
30fps is acceptable, and some cameras handle low light better at 30fps than 24fps. The motion looks slightly more video-like, but on social platforms most viewers won't notice the difference.
60fps is for anything you plan to slow down in the edit. Shot at 60fps and played back at 24fps, you get 2.5x slow motion. Shot at 120fps and played back at 24fps, you get 5x. I use 60fps specifically for walking shots, hair movement, fabric, and performance moments I might want to stretch. On a recent three-minute project I shot 23 minutes of dedicated slow-motion setups at 120fps — everything else was 24fps.
The mistake is shooting the entire video at 60fps because it looks smooth in preview. It doesn't look cinematic in the final edit. Set your main performance shooting to 24fps. Shoot 60fps or 120fps as deliberate slow-motion setups, not as your default.
For phones: set video to 4K 24fps in camera settings. Slow motion on iPhone defaults to 1080p 240fps on most models — on iPhone 15 Pro and newer you can get 4K 120fps, but older models are limited to 1080p for slow motion. That's fine for short inserts but won't match 4K main footage in resolution.
Shutter speed: double your frame rate, every time
Set shutter speed to double your frame rate. That's the whole rule.
- 24fps → 1/50 (1/48 is technically correct but most cameras don't have it — 1/50 is close enough)
- 30fps → 1/60
- 60fps → 1/120
- 120fps → 1/240
This ratio — the 180-degree rule — produces the natural motion blur that makes video look like video rather than a sequence of still photos. It's the single setting most beginners get wrong, and it's the reason footage shot at the right frame rate can still look wrong.
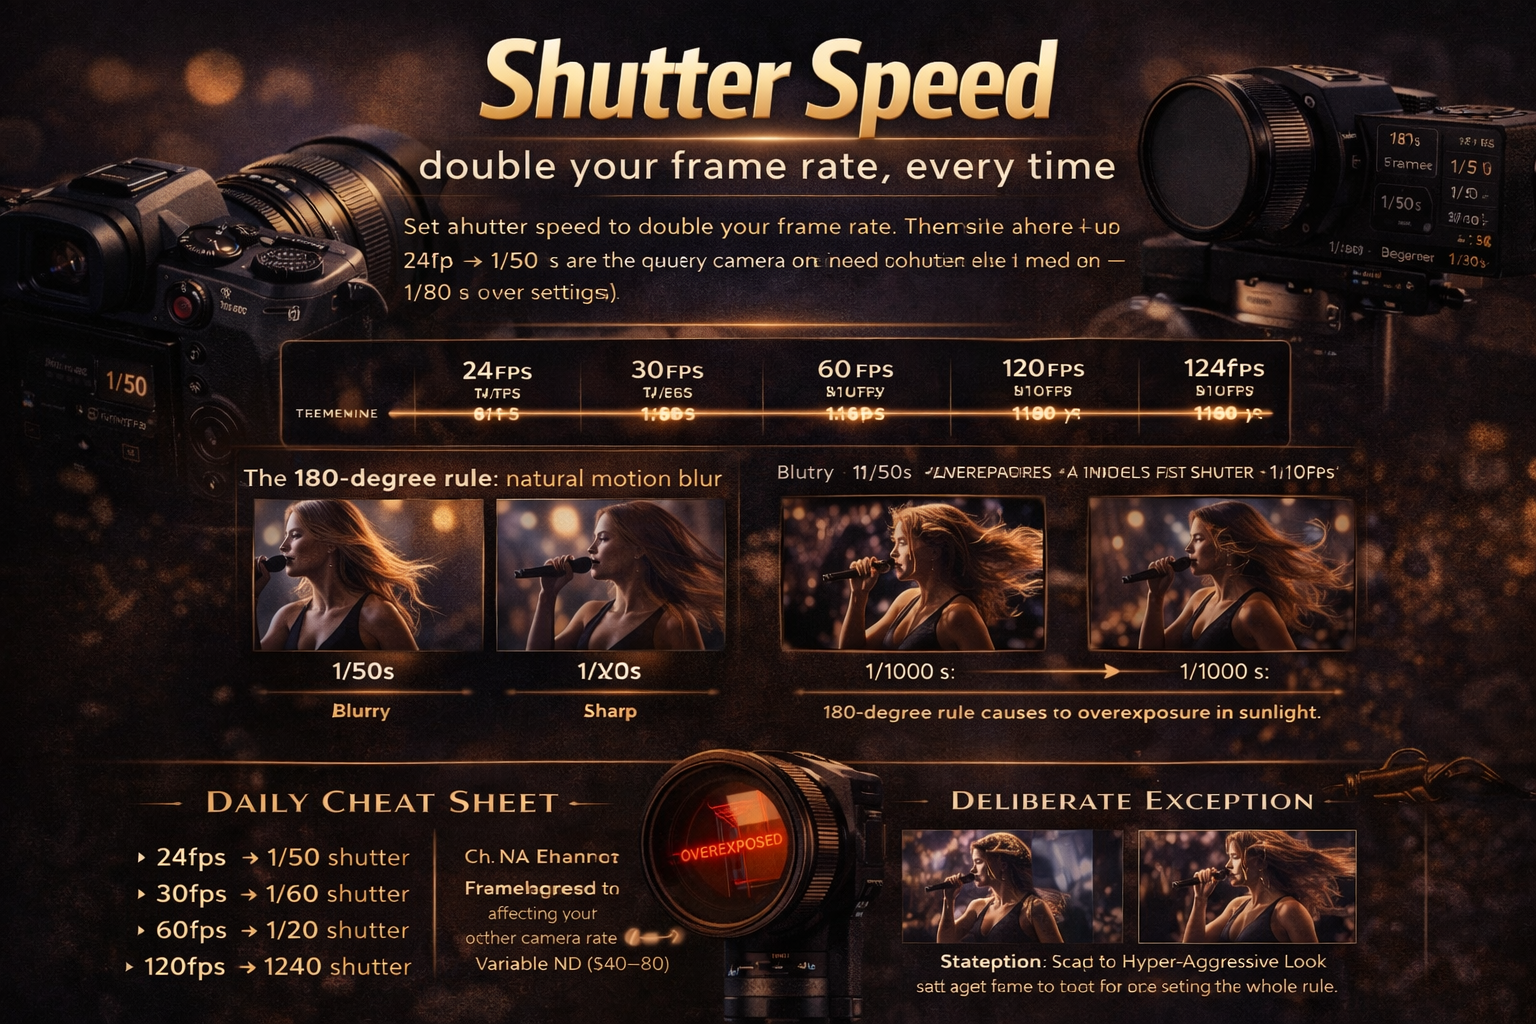
The problem outdoors: following the 180-degree rule in bright sunlight often means the image overexposes badly. You can't raise the shutter speed to compensate without breaking the 180-degree rule and getting that wrong motion look. The fix is an ND filter — a variable ND ($40–80) lets you cut light without touching your other settings. I carry one on every outdoor shoot. Without it you're either overexposed or breaking the rule. There's no third option in bright conditions.
The deliberate exception: raising shutter speed to 1/500 or higher on purpose freezes motion into sharp individual frames — a staccato, hyper-aggressive look. Some rock and EDM videos use this intentionally. It reads as fast and violent when used on the right track. When it appears accidentally, it just looks like the camera operator made a mistake.
Aperture: shallow depth of field vs staying in focus
Aperture controls depth of field and light intake at the same time, which is what makes it the most creative — and most consequential — setting to get wrong.
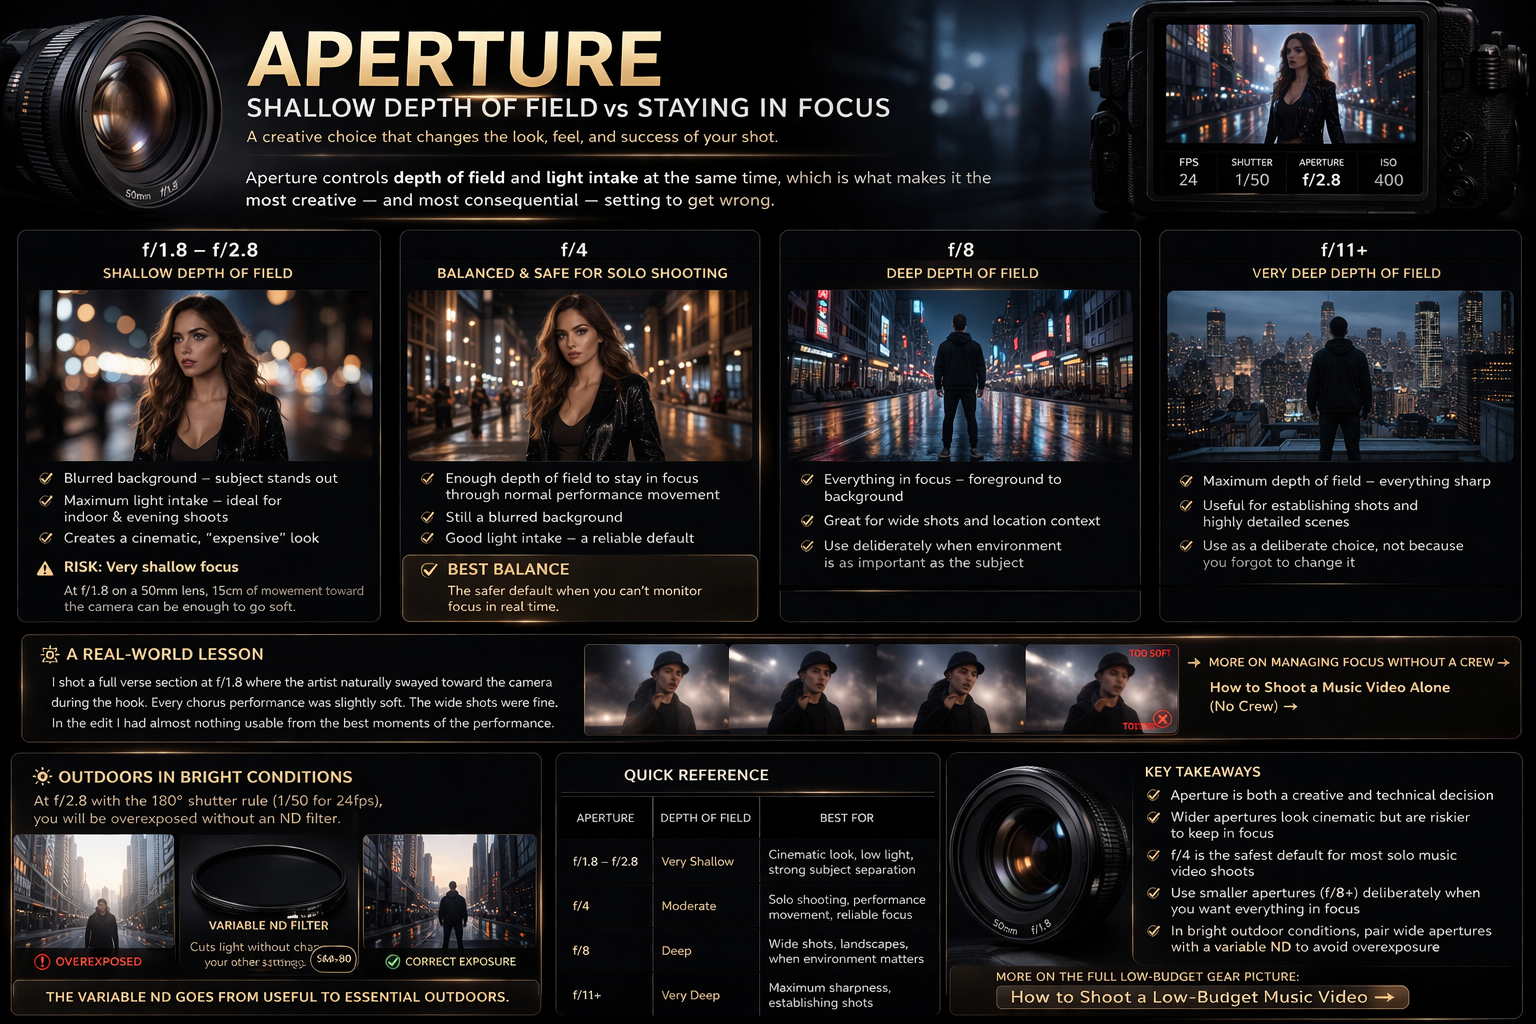
f/1.8–f/2.8 gives you the blurred background that separates subject from environment. This is the primary reason dedicated cameras look more expensive than phone cameras at a glance. It also lets in the most light, which is what makes it useful for indoor and evening shoots. The risk: at f/1.8 on a 50mm lens, 15cm of forward movement toward the camera can be enough to go soft. If you're shooting solo without anyone monitoring focus — which is most low-budget shoots — this creates problems. I shot a full verse section at f/1.8 once where the artist naturally swayed toward camera during the hook. Every chorus performance was slightly soft. The wide shots were fine. In the edit I had almost nothing usable from the best moments of the performance.
f/4 is the balance point for solo shooting — enough depth of field to stay in focus through normal performance movement, still a blurred background, still letting in decent light. It's the safer default when you can't monitor focus in real time. More on managing focus without a crew in How to Shoot a Music Video Alone (No Crew) →
f/8 and above keeps everything sharp — useful for wide location shots or when you want the environment as important as the subject. Use it as a deliberate choice, not a setting you forgot to change from the previous setup.
Outdoors in bright conditions at f/2.8 following the 180-degree rule: you will be overexposed without an ND filter. This is where the variable ND goes from useful to essential. For more on the full low-budget gear picture: How to Shoot a Low-Budget Music Video →
ISO: stay at base, raise only when forced
ISO controls sensor sensitivity to light. Higher ISO means brighter image — and more noise.
Every camera has a base ISO — the native sensitivity where the sensor performs cleanest. On Sony A7 series cameras this is typically around ISO 100 on the low end; Canon EOS R series cameras are generally cleanest at ISO 100. Check your specific model's spec sheet because it varies. This is your starting point and where you stay whenever light allows.
- ISO 100–400: clean, no visible noise, right for daylight and well-lit interiors
- ISO 800–1600: acceptable on modern mirrorless cameras — noticeable but gradeable in post
- ISO 3200+: significant noise. Usable in specific aesthetic contexts (gritty, lo-fi, concert) but not for a clean professional grade
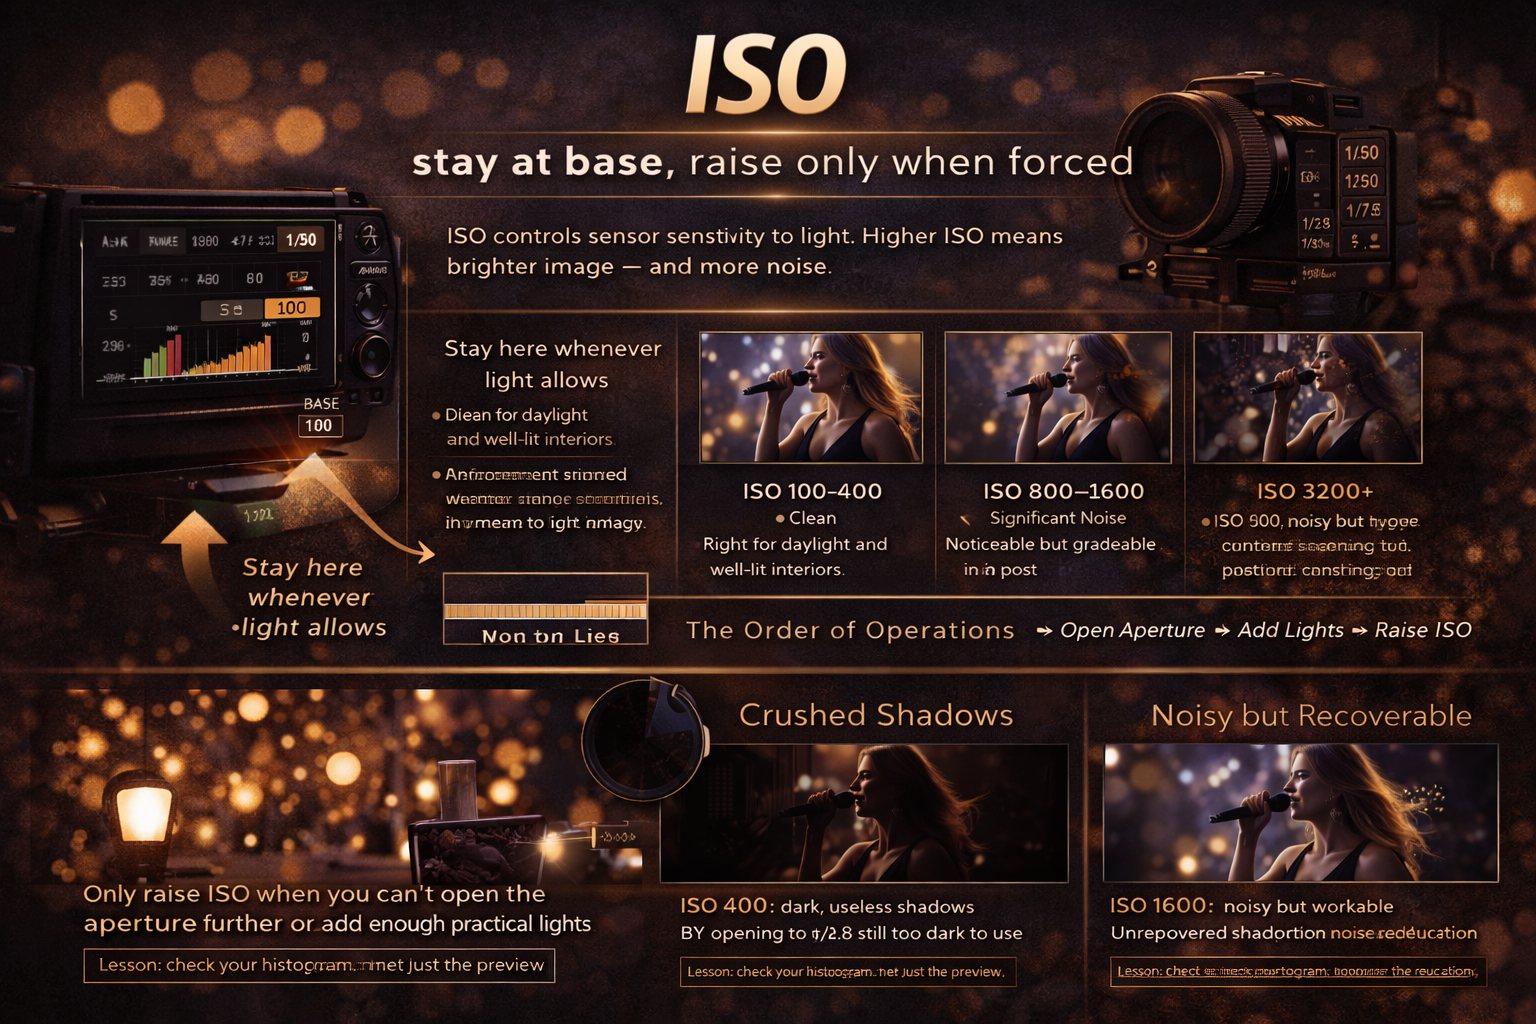
The rule when you can't get enough light: before reaching for ISO, open the aperture first and check if it's enough. Then consider whether you can add practical lights to the environment. ISO is the last lever, not the first. And underexposed footage pushed in post produces worse noise than shooting at ISO 3200 in the first place — so if it's a choice between the two, shoot high ISO.
The last time I got this wrong was shooting an interior performance in a room with one practical bulb. I kept ISO at 400 thinking it looked "acceptable" in preview, then found in the edit that the shadows were completely crushed and the grade had nothing to work with. Shooting at ISO 1600 with the same scene would have given me a noisy but recoverable image. Lesson: check your histogram, not just the preview.
Log profile: shoot flat, grade later
If your camera offers a Log or flat picture profile — S-Log on Sony, C-Log on Canon, N-Log on Nikon, D-Log M on DJI cameras — use it.
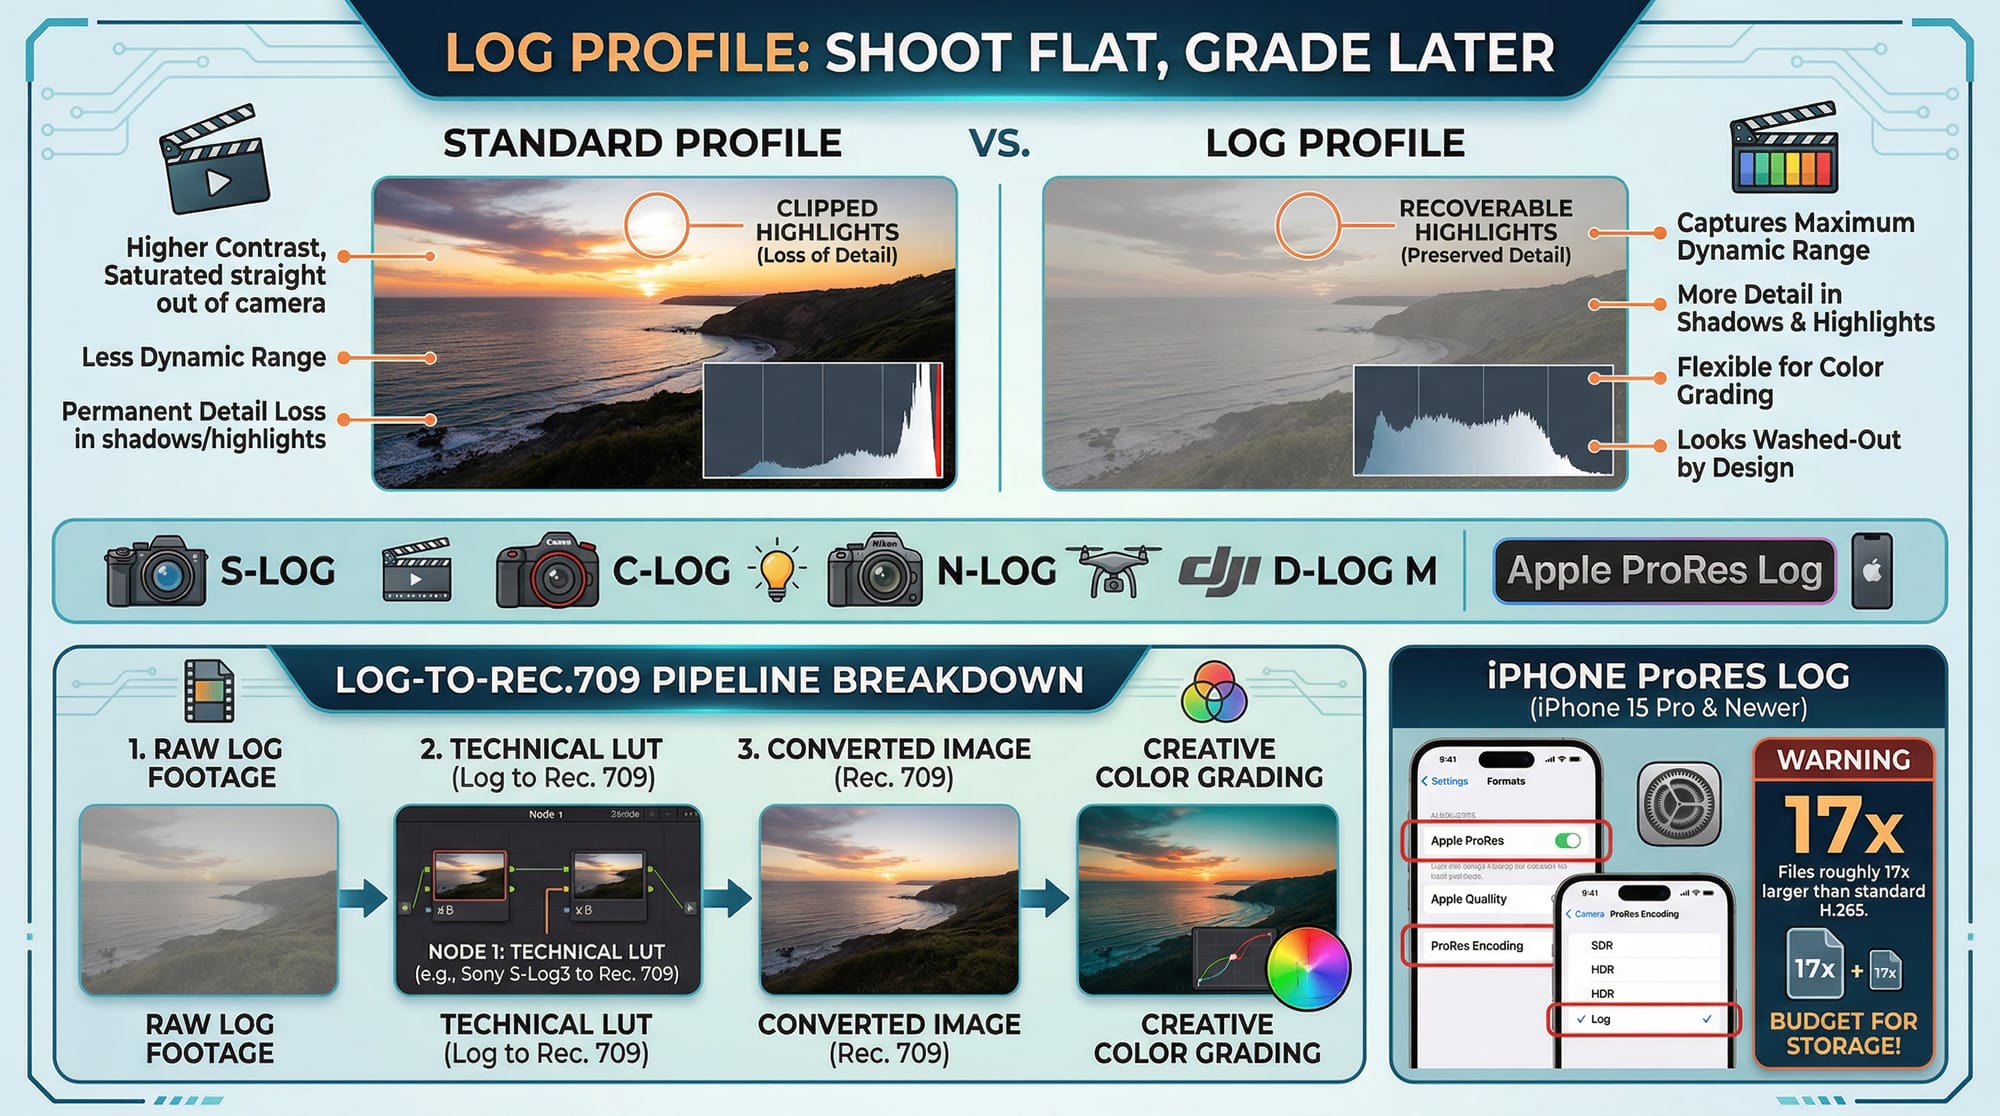
Log footage looks washed-out and low-contrast straight out of camera. That's by design. The profile captures maximum dynamic range — more detail held in shadows and highlights — which gives you significantly more flexibility in colour grading. A shot that looks slightly overexposed in Log often has fully recoverable highlights. The same shot in a standard picture profile has already clipped those highlights permanently, and no grade fixes clipped highlights.
The trade-off: Log footage needs a LUT to convert it to Rec. 709 before grading is meaningful. Without that conversion you're grading on a misleading flat image. In DaVinci Resolve the first node applies your technical LUT (Log to Rec. 709), then you grade on top. Full Log-to-Rec.709 pipeline breakdown in How to Colour Grade for Social Media →
For phone shooting: iPhone ProRes Log is the closest equivalent — enable ProRes in Settings → Camera → Formats, then select Log encoding. Available on iPhone 15 Pro and newer. Files are roughly 17x larger than standard H.265, so budget for storage. For a project you're grading seriously the flexibility is worth it. For casual social content, standard 4K is usually sufficient. I shot a full music video on iPhone 15 Pro in Apple Log last year and the grade held up better than footage I'd previously shot on a mid-range mirrorless in a standard profile — the dynamic range difference was visible.
White balance: lock it before every setup
Auto white balance shifts during a take as the camera adjusts to changing light — clouds, movement between shadow and sun, a lamp turning on behind the subject. That shift is visible in the footage and reads immediately as amateur.

Lock white balance manually before every setup. Match it to your light source:
- Daylight / overcast: 5600K
- Golden hour: 4000–4500K
- Indoor tungsten bulbs: 3200K
- Indoor LED panels: check the panel spec (usually 5600K or 3200K depending on the panel)
Mixing sources — natural window light plus a practical lamp — choose the dominant source and set white balance to that. In post you can nudge it, but locked white balance gives you consistent colour across every take in a setup. On iPhone: Settings → Camera → Record Video → Lock White Balance. Without this, the iPhone adjusts white balance continuously during recording, and the shift is especially obvious on skin tones.
Settings cheat sheet
| Setting | Cinematic performance | Slow motion inserts | Concert / low light |
|---|---|---|---|
| Frame rate | 24fps | 60fps or 120fps | 24fps |
| Shutter speed | 1/50 | 1/120 or 1/240 | 1/50 |
| Aperture | f/1.8–f/2.8 | f/1.8–f/2.8 | f/1.8 (widest available) |
| ISO | Base (100–400) | Base | 1600–3200 if needed |
| Profile | Log if available | Log if available | Log if available |
| White balance | Manual, locked | Manual, locked | Manual, locked |
FAQ
What camera settings are best for shooting music videos? 4K, 24fps, shutter speed 1/50, aperture f/1.8–f/2.8, base ISO, Log picture profile if your camera supports it, white balance locked manually. These are starting points — outdoor bright light requires an ND filter to keep shutter at 1/50, and low light may push ISO higher than ideal.
Should I film in 4K 30 or 4K 60? 4K 30fps for main performance footage if you want real-time playback. 4K 60fps only for footage you plan to slow down — played back at 24fps it gives 2.5x slow motion. Shooting the entire video at 60fps tends to lose the cinematic quality of 24fps in the final edit.
Is F2.8 enough for a concert or low-light shoot? Often, yes — f/2.8 lets in significantly more light than f/4 and works well in reasonably lit indoor venues. In very dark concert environments you may need f/1.8 or f/1.4, combined with higher ISO. The trade-off at f/1.8 is shallow depth of field — staying in focus on a moving performer becomes harder and mistakes in focus are more visible.
Is it better to shoot in 16:9 or 4:3? 16:9 for most music video work — it's the standard widescreen format for YouTube and streaming. 9:16 vertical if you're shooting specifically for TikTok, Reels, or Shorts. 4:3 is occasionally used for an intentional retro or film aesthetic but it's a creative choice, not a technical default. Aspect ratios per platform in detail: Best Aspect Ratios for Every Platform →
What are the best camera settings for music videos on iPhone? Settings → Camera → Record Video → 4K at 24fps. Turn on Lock White Balance. For slow motion: Record Slo-mo → 1080p at 120fps (4K 120fps is available on iPhone 15 Pro and newer only). For serious grading: enable ProRes in Formats, select Log encoding. In the camera app, tap and hold to lock exposure and focus before each take.
What are the best camera settings for music videos on Android? Switch to Pro or Manual video mode. Set frame rate to 24fps, shutter speed to 1/50, ISO to the lowest available (typically 50–100). If your phone offers a flat or Log picture profile (Samsung Expert RAW, DJI cameras), enable it. Lock white balance to match your light source — 5600K for daylight, 3200K for indoor tungsten.
What are cinematic camera settings for a music video? The cinematic look comes from a specific combination: 24fps + 1/50 shutter produces the motion blur cadence that reads as film. Aperture f/1.8–f/2.8 separates subject from background. Base ISO keeps the image clean. Log profile preserves dynamic range for grading. None of these settings alone creates the look — it's the combination that does it. Starting numbers in DaVinci for the grade on top: lift shadows -2 to -3, S-curve for contrast, saturation at 85–90, warm push to midtones 3–5 points toward orange.
Do I need an ND filter for music video shooting? Outdoors in daylight: yes. Without an ND filter you can't follow the 180-degree shutter rule at f/2.8 in bright conditions without overexposing. A variable ND filter ($40–80 for a decent one) solves this — it cuts light without affecting shutter speed or aperture. Per Artlist's guide to slow motion and ND filters, the 180-degree rule applies to slow motion setups too: at 120fps, shutter should be 1/240, and an ND filter is often still needed outdoors. Indoors or at night: usually not necessary.
What's the best mobile setup for YouTube videos shot as music content? 4K 24fps, locked white balance, Log or flat picture profile if available. Use a tripod for static shots and a gimbal for movement — handheld phone footage shows camera shake far more than handheld mirrorless footage. Shoot in the back camera, not the front — the resolution and low light performance are significantly better. For YouTube specifically, 4K source footage downscaled to 1080p in export looks sharper than footage shot natively at 1080p.